welt pocket tutorial
Welt Pocket Tutorial: A Comprehensive Guide
Embark on a detailed sewing journey! This guide, referencing resources from Frocks & Frolics and AURI, will expertly teach you welt pocket construction techniques.
Welt pockets are a classic tailoring detail, adding a refined and professional finish to garments. Often seen in jackets, trousers, and skirts, they represent a step up in sewing complexity from simple patch or inseam pockets. Learning to construct them unlocks a new level of garment-making skill.
These pockets aren’t merely functional; they’re a design element. The clean, finished appearance of a welt pocket elevates the overall look of a piece. Tutorials from sources like AURI and patterns from Frocks & Frolics demonstrate the precision involved. Mastering welt pockets allows for customization – single or double welt variations, piped details, or even adding flaps, as highlighted in various online resources and PDF patterns.
What is a Welt Pocket?
A welt pocket is a pocket constructed with a fabric opening – the “welt” – that’s finished with a strip of fabric, creating a clean, bound edge. Unlike a patch pocket sewn directly onto the garment, or an inseam pocket hidden within seams, a welt pocket is integrated into the garment fabric itself.
Essentially, a slit is created in the fashion fabric, and then a separate piece of fabric (the welt) is applied around this opening, forming a neat frame. Resources like those found through PDF sewing patterns emphasize the importance of precise cutting and careful pressing. This construction method results in a durable and aesthetically pleasing pocket, often used in tailored clothing, as demonstrated in tutorials from various online sources.
Types of Welt Pockets
Welt pockets aren’t one-size-fits-all! They come in several variations, each offering a slightly different look and level of complexity. The two primary types are single and double welt pockets. A single welt pocket features a single layer of fabric forming the welt, offering a simpler construction, ideal for lighter fabrics.
Conversely, a double welt pocket utilizes two layers of fabric for the welt, providing increased durability and a more refined appearance, often preferred for heavier materials like denim, as seen in patternmaking techniques. Beyond these, variations include piped and flap welt pockets, adding decorative elements; Understanding these distinctions, highlighted in sewing tutorials, is crucial for selecting the appropriate style for your project.
Single Welt Pocket
The single welt pocket is a foundational technique! It’s characterized by a clean finish achieved with a single layer of fabric creating the pocket opening. Sewing guides, like those from Born To The Purple Capelet, emphasize precise marking of the welt placement on the garment front.
This involves carefully cutting both the welt piece and the pocket bag. Applying the welt requires accurate stitching and careful pressing to achieve a crisp, professional look. The pocket bag is then attached, ensuring a secure and functional pocket. Mastering this technique, often demonstrated in video tutorials, provides a solid base for tackling more complex welt pocket styles.
Double Welt Pocket
The double welt pocket offers a refined, symmetrical appearance! Creating this pocket begins with constructing a double welt facing, demanding precision in pattern cutting and stitching. Resources highlight the importance of accurately attaching this facing to the garment, ensuring a balanced and polished finish.
Securing the pocket bag to the double welt requires careful alignment and stitching. Techniques, often found in PDF pattern instructions like those for denim jackets, emphasize a clean interior finish. This style, sometimes featuring zippered variations, elevates the garment’s design. Mastering the double welt pocket demonstrates advanced sewing skills and attention to detail.
Tools and Materials Needed
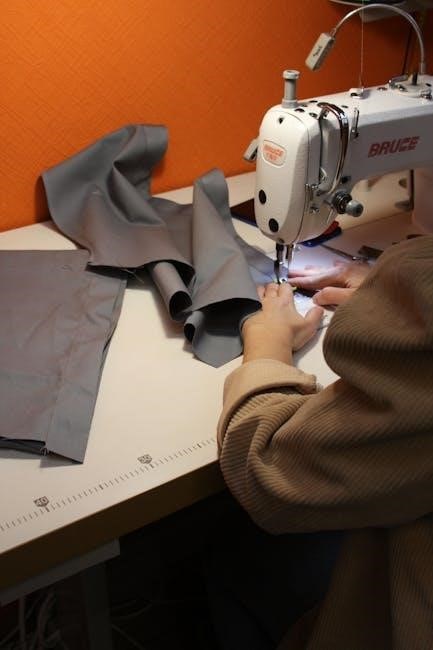
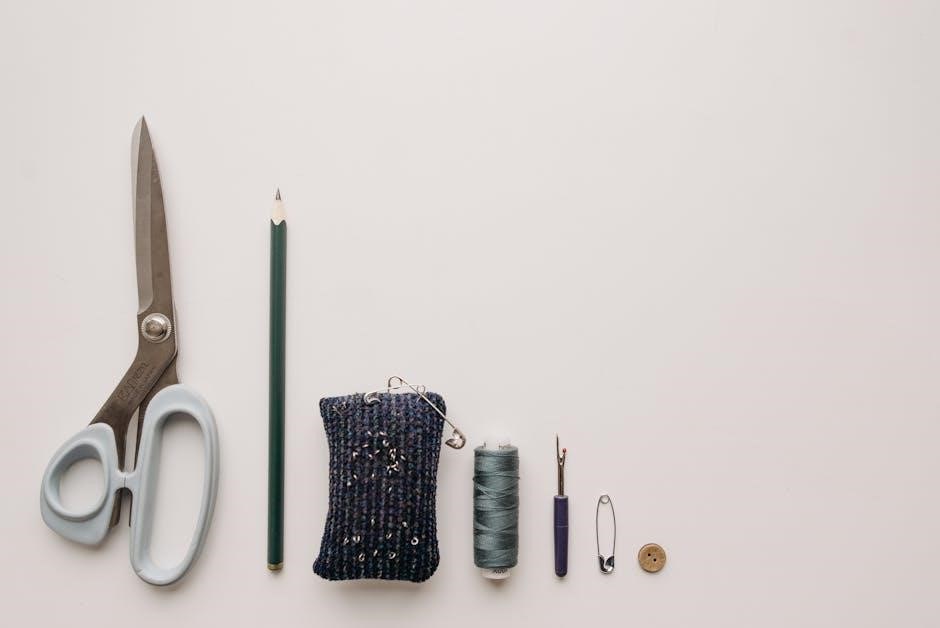
Successful welt pocket construction requires specific tools and quality materials! Essential items include sharp fabric scissors for precise cutting of pattern pieces – welt and pocket bag patterns are crucial. A seam ripper is invaluable for correcting mistakes, while pins securely hold fabric layers during stitching.
You’ll need a sewing machine with appropriate needles for your fabric weight, and matching thread for an invisible finish. A pressing iron and ironing board are vital for crisp, professional results. Consider using tailor’s chalk or a fabric marker for accurate marking. PDF patterns often list specific notions, ensuring a smooth sewing process.
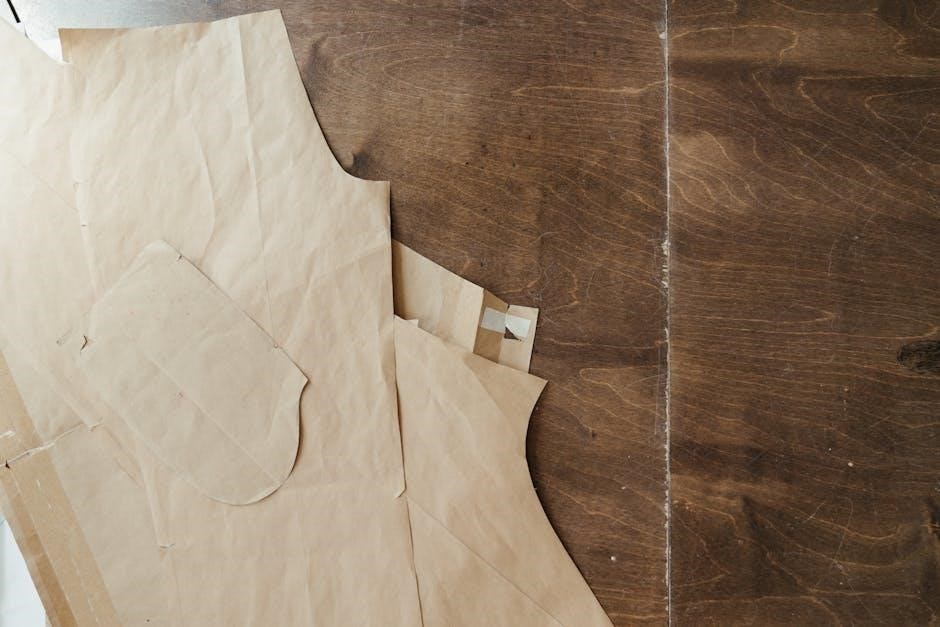
Preparing the Pattern Pieces
Accurate pattern pieces are foundational for a well-executed welt pocket! Begin by carefully tracing or printing your welt pattern piece; precision is key for a clean finish. Many tutorials, like those referencing Frocks & Frolics, emphasize accurate pattern drafting. Next, create a separate pattern piece for the pocket bag, ensuring it’s appropriately sized for your desired pocket depth.
Remember to add seam allowances to both pieces – typically 1/2 inch is standard. Consider interfacing the welt piece for added stability and to prevent stretching. Carefully cut out both pattern pieces from your chosen fabric, paying attention to grain direction for optimal results.
Welt Pattern Piece Creation
Crafting the welt pattern requires precision! Start with a rectangular shape – its length determines the pocket opening, while the width dictates the welt’s finished size. Resources like patternmaking techniques for denim jackets suggest careful consideration of these dimensions. Add seam allowances around all sides, typically 1/2 inch.
To create the angled ends characteristic of welt pockets, mark points along the length and connect them to form a trapezoid. This angle is crucial for a neat, professional finish. Interfacing this piece is highly recommended for stability, preventing stretching during application. Accurate drafting ensures a symmetrical and functional welt.
Pocket Bag Pattern Piece
The pocket bag provides the functional depth! This piece is typically a simple rectangle, sized according to your desired pocket capacity. Consider the items you intend to store within – larger objects require a deeper bag. Add seam allowances, mirroring those used on the welt pattern, generally 1/2 inch around all edges.
Ensure the pocket bag’s width is slightly narrower than the finished welt opening to prevent it from being visible when the pocket is in use. Interfacing isn’t always necessary for the pocket bag, depending on the fabric weight, but can add structure; Precise cutting is vital for a clean, well-defined pocket interior.

Step-by-Step Sewing Instructions: Single Welt Pocket
Begin by accurately marking the welt placement on your garment’s right side, utilizing pattern markings or a ruler for precision. Carefully cut the welt piece and pocket bag, ensuring clean edges. Apply the welt to the garment front, pinning it securely and stitching along the marked lines, leaving openings for turning.

Clip into the corners of the welt to reduce bulk and facilitate smooth turning. Turn the welt through the opening, pressing it flat. Finally, attach the pocket bag to the welt, carefully aligning edges and stitching securely. This creates a functional and refined single welt pocket!
Marking the Welt Placement
Precise welt placement is crucial for a professional finish. Begin by referencing your pattern piece for the designated welt position on the garment front. Utilize tailor’s chalk or a fabric marker to carefully transfer these markings, ensuring they are clear and accurate. Consider the desired angle and length of the welt – typically, a slight diagonal placement enhances the aesthetic.
Double-check your markings against the pattern, paying close attention to symmetry if creating multiple welt pockets. Accurate marking prevents unevenness and ensures a balanced appearance. Remember to account for seam allowances when transferring the welt dimensions.
Cutting the Welt and Pocket Bag
Accurate cutting ensures a clean welt and functional pocket. Using your prepared pattern pieces, carefully cut out the welt pieces – typically two identical rectangles – from your chosen fabric. Pay attention to grain direction for consistent stretch and drape. Next, cut the pocket bag pieces, ensuring they are appropriately sized to accommodate your intended items.
When cutting, add seam allowances as indicated on your pattern. Precise cutting is vital; slightly off measurements can impact the final result. Consider using sharp fabric scissors or a rotary cutter for clean, accurate edges. Double-check all cut pieces against the pattern before proceeding.
Applying the Welt to the Garment Front
Precise placement is key for a professional finish. Position the welt piece onto the right side of your garment front, aligning it with the marked placement lines. Pin securely, ensuring the welt edges are smooth and even. Using a suitable stitch length, carefully stitch along the marked lines, creating the opening for the pocket.
Take your time and maintain consistent stitching. Clipping the corners carefully, without cutting through the stitching, will reduce bulk and allow for clean turning. Press the welt open, shaping the opening neatly. This step establishes the foundation of the welt pocket, so accuracy is paramount for a polished look;
Attaching the Pocket Bag
Secure the pocket bag for functionality and durability. With the welt now applied, carefully position the pocket bag piece behind the welt opening on the inside of the garment. Pin the pocket bag securely to the welt and the garment fabric, ensuring it’s fully enclosed within the welt opening. Stitch around the perimeter of the pocket bag, attaching it firmly to both the welt and the garment.

Reinforce the corners with backstitching for added strength. Press the pocket bag neatly, ensuring a smooth finish. This final step completes the welt pocket, creating a functional and aesthetically pleasing detail on your garment.
Step-by-Step Sewing Instructions: Double Welt Pocket
Creating a sophisticated double welt pocket requires precision. Begin by constructing the double welt facing, a crucial element for a clean finish. Attach this facing to the garment, carefully aligning and pinning it before stitching. This establishes the foundation for the dual welt openings.
Next, meticulously secure the pocket bag to the double welt, ensuring it’s fully enclosed and properly positioned. Stitch around the bag’s perimeter, reinforcing corners for durability. Pressing is key – a neat press defines the pocket’s professional appearance. Resources like those from DÜRKOPP ADLER can aid in achieving a polished result.
Creating the Double Welt Facing
The double welt facing is the cornerstone of this pocket style. It’s constructed from pattern pieces carefully cut and interfaced for stability. Precision in cutting is paramount, ensuring both welt pieces are identical in size and shape. These pieces will ultimately form the visible opening of the pocket.
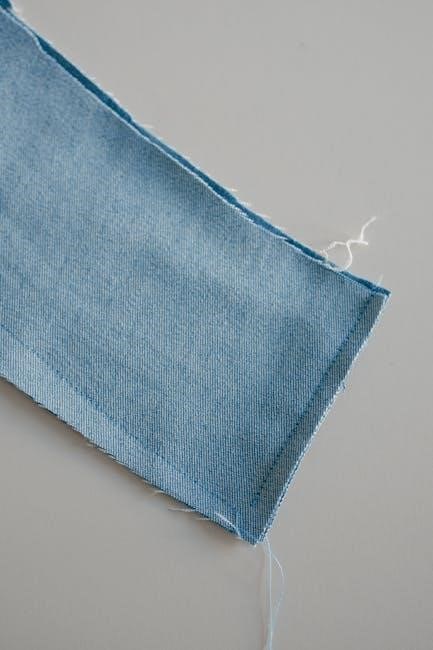
Fuse interfacing to the wrong side of each welt piece, providing structure and preventing stretching during application. Join the two welt pieces together along their length, right sides facing, leaving one end open for turning. Turn the joined welt right side out, pressing it flat to create a crisp, defined edge. This facing will be attached to the garment front.
Attaching the Double Welt to the Garment
Precise placement is key when attaching the double welt facing. Position the welt facing onto the garment front, aligning it with the marked welt placement line. Pin securely, ensuring the edges are even and the opening is centered. Stitch along both long sides of the welt, close to the edge, using a standard stitch length.
Carefully clip into the corners of the welt, being cautious not to cut through the stitching. This allows for clean turning and reduces bulk. Turn the welt through the opening, gently easing the fabric to create a crisp, defined welt. Press the welt flat, ensuring the edges are neatly aligned and the opening is smooth.
Securing the Pocket Bag to the Double Welt
With the welt firmly attached, it’s time to secure the pocket bag. Place the pocket bag inside the welt opening, aligning the edges carefully. Pin the pocket bag to the double welt, ensuring it’s evenly distributed and won’t twist or pull when in use. Stitch around the three remaining sides of the pocket bag, attaching it securely to the welt.
Reinforce the corners with a few backstitches for added durability. Press the pocket bag flat, smoothing out any wrinkles or puckering. Finally, inspect the pocket for any loose threads or uneven stitching, ensuring a professional and long-lasting finish. Your double welt pocket is now complete!
Common Mistakes and How to Avoid Them
Welt pocket perfection requires attention to detail! A frequent error is inaccurate welt cutting – always use a precise pattern. Uneven stitching can occur; slow down and use a consistent seam allowance. Forgetting to clip the curves before turning the welt results in puckering, so remember this crucial step.
Another common issue is improperly aligning the welt before attaching it to the garment. Pin carefully! Finally, avoid stretching the fabric during sewing, which distorts the pocket’s shape. Refer to video tutorials (like those mentioned) for visual guidance and practice on scrap fabric before tackling your final project.

Welt Pocket Variations
Beyond the basic welt, explore exciting possibilities! Piped Welt Pockets add a decorative edge using contrasting fabric, enhancing visual appeal. Flap Welt Pockets incorporate a folded flap over the welt opening, offering a more secure closure and a refined look.
DÜRKOPP ADLER resources highlight specialized guides for buttonhole flaps within lining pockets, demonstrating advanced techniques. Consider experimenting with different welt widths and lengths to customize your designs. These variations elevate garment construction, showcasing skill and creativity. Remember to adjust pattern pieces accordingly for each variation, ensuring a professional finish.
Piped Welt Pockets
Elevate your welt pocket with a delicate piped edge! This technique introduces a contrasting fabric strip – the piping – along the welt’s perimeter, creating a refined and visually striking detail. The piping adds subtle texture and color, enhancing the overall garment aesthetic.
Careful precision is key when constructing piped welt pockets. Accurate cutting and placement of the piping are crucial for a clean finish. Consider the color and fabric choice of the piping to complement the garment’s design. Resources suggest exploring various piping materials for unique effects. Mastering this variation demonstrates advanced sewing skills and attention to detail.
Flap Welt Pockets
Add a functional and stylish element with a flap welt pocket! This variation incorporates a folded piece of fabric – the flap – extending beyond the welt opening, providing extra coverage and a secure closure option. The flap can be finished with a button, snap, or simply left open for a relaxed look.
Constructing flap welt pockets requires careful consideration of the flap’s size and shape, ensuring it complements the pocket’s overall design. Precise alignment and secure attachment of the flap are essential for a professional finish. Explore different flap styles, from simple rectangular shapes to more elaborate curved designs, to personalize your garment. This technique blends practicality with aesthetic appeal.
Resources for Further Learning
Expand your welt pocket expertise with these valuable resources! Numerous online video tutorials, like those from AURI, offer visual guidance through each step of the process, clarifying complex techniques. For structured learning, explore PDF sewing patterns – Frocks & Frolics provides excellent options – that include detailed welt pocket instructions.
Dürkopp Adler documentation details specialized guides for pocket construction, including buttonhole flaps. Websites offering patternmaking techniques for denim jackets often feature welt pocket integration. Remember to search for patterns specifically mentioning “welt pockets” to streamline your search. Continuous practice and exploration of these resources will refine your skills!

Online Video Tutorials
Visual learners will thrive with online video tutorials! AURI provides a step-by-step welt pocket explanation, easily adaptable for various projects. These tutorials break down the process into manageable segments, ideal for beginners. Search platforms like YouTube using keywords like “welt pocket tutorial” or “sewing welt pockets” to discover a wealth of demonstrations.
Frocks & Frolics also references utilizing video tutorials alongside their patterns. Look for videos demonstrating both single and double welt pocket construction. Pay attention to techniques for precise cutting, accurate marking, and neat stitching. Remember to pause and rewind as needed to fully grasp each step, enhancing your understanding and skill.
PDF Sewing Patterns with Welt Pockets
Elevate your sewing with patterns featuring welt pockets! Frocks & Frolics offers PDF sewing patterns incorporating this technique, providing a complete project experience. Explore patterns for garments like jackets and skirts, specifically designed with welt pockets. These patterns often include detailed instructions and pattern pieces tailored for accurate construction.
Look for patterns that clearly illustrate welt placement and provide guidance on fabric choices. Resources mention patterns for denim jackets utilizing welt pocket techniques. Websites offering downloadable patterns, like those found through searches for “pdf-sewing-pattern,” are excellent starting points. Utilizing a dedicated pattern streamlines the process and ensures a professional finish.