honeywell t4 install manual
HONEYWELL T4 Pro Programmable Thermostat: Installation Guide
This comprehensive guide details the installation of your Honeywell T4 Pro thermostat, covering everything from initial setup to advanced configurations for optimal performance.
Package Contents
Upon opening the Honeywell T4 Pro thermostat package, carefully verify that all components are present and undamaged. The standard package includes the T4 Pro thermostat unit itself, a mounting base plate for secure wall installation, and installation screws with wall anchors for various surface types.
You should also find a detailed installation guide – this document! – providing step-by-step instructions. Wire labels are included to help identify existing wiring during the installation process, minimizing confusion and ensuring correct connections. Finally, a quick start guide offers a simplified overview for immediate setup, and potentially an optional cover plate for aesthetic purposes.
Understanding the Thermostat Components
The Honeywell T4 Pro features a user-friendly interface centered around a vibrant touchscreen display, providing clear visibility of temperature settings and system status. The thermostat body houses the internal control circuitry and connects to the mounting base for power and wiring.
Key components include the terminal block, located on the base, for connecting system wires – heating, cooling, and common wires. The Installer Setup (ISU) jumper allows for customized configuration during installation. Understanding these elements is crucial for a smooth setup. The unit also incorporates sensors for accurate temperature readings and a fan control mechanism for optimized airflow.
Safety Precautions
Before commencing installation, always disconnect power to your heating and cooling system at the breaker panel to prevent electrical shock. Exercise caution when handling wiring, ensuring connections are secure and properly insulated. This thermostat is designed for use with low-voltage systems only; do not connect to line voltage.
Read the Sensepoint XCD manual prior to installation, adhering to all specified guidelines. Installation should be performed by a qualified technician if you are unfamiliar with electrical work. Ensure the thermostat is installed in a location free from moisture and extreme temperatures. Failure to follow these precautions could result in damage to the equipment or personal injury.
Installation Preparation
Proper preparation is key for a smooth installation; verify system compatibility, gather necessary tools, and understand available power options before proceeding.
Tools Required
Before beginning the installation process, ensure you have the following tools readily available. A Phillips head screwdriver is essential for securing the thermostat base and wiring connections. A flathead screwdriver may also be needed for certain terminal screws. Wire strippers are crucial for preparing the thermostat wires, ensuring clean and reliable connections. A level will guarantee the thermostat is mounted straight for accurate temperature readings and a professional appearance.
Additionally, a voltage tester is highly recommended to verify power is safely disconnected before working with any wiring. Pliers can assist with bending or manipulating wires as needed. A drill with appropriate drill bits may be required if mounting to a hard surface, and a pencil is useful for marking screw locations. Finally, having a digital multimeter on hand can aid in troubleshooting any electrical issues that may arise during installation.
System Compatibility Check
Prior to installation, verifying your heating and cooling system’s compatibility is paramount. The Honeywell T4 Pro is generally compatible with most 24V heating and cooling systems, including forced air, heat pump, and hydronic (hot water) systems. However, it’s crucial to confirm your system doesn’t utilize line voltage (120V or 240V) as the T4 Pro is not designed for these systems.
Carefully examine your existing thermostat wiring. If you observe wires connected to terminals labeled with higher voltages, do not proceed with the installation. Consult a qualified HVAC technician. The T4 Pro supports single-stage, multi-stage, and heat pump systems, but specific configurations may require additional settings during setup. Review your system’s documentation or contact Honeywell support if unsure about compatibility.
Power Options
The Honeywell T4 Pro thermostat primarily operates on 24VAC power, commonly supplied by the heating and cooling system’s control transformer. It does not require batteries for basic operation, ensuring reliable performance even during power outages – though system functionality will be limited without 24VAC.
Understanding wiring terminal designations is crucial. The UWP (Universal Wiring Platform) simplifies connections. Ensure the power supply is disconnected before any wiring. The thermostat is rated for 32 Volts DC, with a maximum power draw of 5.5W. Installation Drawing No.3001G0471 details electrical specifications. Always adhere to Class 2 wiring guidelines for safety and proper operation; Incorrect wiring can damage the thermostat or your HVAC system.
UWP Wiring Terminal Designations
The Universal Wiring Platform (UWP) on the Honeywell T4 Pro streamlines the wiring process. Terminals are clearly labeled for common HVAC components: Rh and Rc for heating power, C for common (24V), W for heat, Y for cooling, and G for the fan.
Proper identification is key. Refer to Installation Drawing No.3001G0471 for a detailed UWP diagram. The thermostat supports various system configurations, and the UWP accommodates different wiring schemes. Ensure correct terminal connections to avoid system malfunctions. The T4 Pro is designed to work with 24VAC systems, and the UWP facilitates easy adaptation to existing wiring. Always disconnect power before making any connections.
Wiring Conventional Systems: Forced Air and Hydronics
Forced air systems typically utilize Rh, Rc, W, Y, and G terminals. Connect the heating wire to ‘W’, cooling to ‘Y’, and the fan to ‘G’. Hydronic systems (hot water radiators) often require a different wiring approach, utilizing the same core terminals but potentially needing additional configurations for zone control.
Carefully review system-specific wiring diagrams. Installation Drawing No.3001G0471 provides examples for typical installations. Ensure the common wire (C) is connected for reliable power. Incorrect wiring can damage the thermostat or HVAC equipment. Always prioritize safety and disconnect power before working with wiring.
Thermostat Mounting
Securely mounting the thermostat is crucial for accurate temperature readings and reliable operation. Proper placement avoids drafts and direct sunlight for optimal performance.
Wall Mounting Considerations
Selecting the ideal location for your Honeywell T4 Pro is paramount for accurate temperature sensing and efficient system control. Avoid mounting the thermostat on exterior walls, as they are prone to temperature fluctuations due to poor insulation.
Also, steer clear of areas directly exposed to sunlight, drafts from doors or windows, or heat-generating appliances like lamps or televisions. These factors can significantly skew temperature readings, leading to inaccurate heating or cooling.
The thermostat should be mounted approximately 5 feet (1.5 meters) above the floor, in a central location within the area you wish to control. Ensure the wall surface is flat and stable to provide a secure mounting base. Consider existing wiring locations to minimize the need for extensive wiring modifications during installation.
Installer Setup (ISU)
The Installer Setup (ISU) mode unlocks advanced configuration options for the Honeywell T4 Pro, allowing for customized system settings beyond the standard user interface. Accessing ISU typically involves a specific button sequence pressed during thermostat power-up – consult the full manual for the precise steps.
Within ISU, you can define system types (forced air, hydronic, etc.), configure heating and cooling stages, and calibrate temperature sensors for optimal accuracy.
This mode is crucial for ensuring compatibility with diverse HVAC systems and tailoring the thermostat’s operation to specific installation requirements. Remember to exit ISU mode once configuration is complete to prevent accidental changes by end-users. Proper ISU setup is key to a smoothly functioning and efficient heating and cooling system.
Mounting the Thermostat Base
Securely mounting the thermostat base is fundamental for reliable operation. Begin by selecting a suitable wall location, avoiding direct sunlight, drafts, and areas near heat-generating appliances. Use the provided mounting screws and wall anchors for a firm attachment.
Ensure the base is level for accurate temperature readings and a professional appearance; Carefully route the existing thermostat wires through the opening in the base, leaving sufficient slack for easy connection to the terminals.
Double-check that the base is firmly secured before proceeding with wiring. A wobbly base can lead to connection issues and inaccurate temperature control. Proper mounting ensures long-term stability and optimal performance of your Honeywell T4 Pro.
Wiring the Thermostat
Proper wiring is crucial for correct operation. Identify system wires carefully and connect them securely to the appropriate terminals, following diagrams closely.
Identifying System Wires
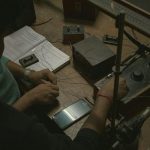
Before connecting any wires, it’s essential to accurately identify each one. Carefully remove the old thermostat’s faceplate to reveal the existing wiring. Do not disconnect wires without labeling them first! Use the provided wire labels or masking tape and a pen to mark each wire corresponding to its terminal designation on the old thermostat.
Common wire colors include Red (typically 24V power), White (heating), Yellow (cooling), Green (fan), and Blue (common). However, wire colors can vary, so rely on the terminal labels, not the color. If you’re unsure about any wire, consult a qualified HVAC technician. A multimeter can also be used to verify voltage and identify live wires, but exercise extreme caution when working with electricity.
Refer to the wiring diagrams specific to your system type (forced air or hydronics) for accurate identification.
Connecting the Wiring Terminals
Once wires are identified and labeled, carefully connect them to the corresponding terminals on the Honeywell T4 Pro baseplate. Use a small, flat-head screwdriver to loosen the terminal screws. Insert each wire fully into the terminal, ensuring no bare wire is exposed beyond the clamp. Tighten the screws securely, but avoid over-tightening, which could damage the terminals.
Double-check that each wire is connected to the correct terminal according to your system’s wiring diagram. Incorrect wiring can cause system malfunction or damage. Pay close attention to the common (C) wire, as it’s crucial for powering the thermostat.
Gently tug on each wire to confirm a secure connection before proceeding.
Wiring Diagrams for Common Systems
Refer to the provided wiring diagrams for typical heating and cooling system configurations. These diagrams illustrate the correct terminal connections for forced air, hydronic (hot water), and heat pump systems. Carefully match your existing wiring to the appropriate diagram, noting the specific wire colors and terminal designations.
If your system configuration differs from the provided diagrams, consult a qualified HVAC technician. Incorrect wiring can lead to system malfunction or damage. Diagrams typically show connections for Rh, Rc, W, Y, G, and C wires.
Always prioritize safety and disconnect power before working with wiring.

System Configuration
Proper system configuration ensures optimal thermostat operation. This involves setting the system type, configuring heating/cooling stages, and accurately setting the time and date.
Setting the System Type
Accurately defining your heating and cooling system is crucial for correct thermostat operation. The Honeywell T4 Pro supports various system types, including forced air, hydronic, and heat pump configurations. During the initial setup, the thermostat will prompt you to identify your system.
Carefully review the available options and select the one that precisely matches your home’s setup. Incorrectly identifying the system type can lead to inefficient operation, inaccurate temperature readings, and potential damage to your HVAC equipment. If you are unsure about your system type, consult a qualified HVAC technician for assistance. The thermostat’s menu allows for adjustments if a wrong selection was initially made.
Configuring Heating and Cooling Stages

The Honeywell T4 Pro allows for configuration of multiple heating and cooling stages, optimizing comfort and energy efficiency. This feature is particularly beneficial for systems with variable-speed blowers or multi-stage compressors. Access the system configuration menu to define the number of stages for both heating and cooling;
Properly setting the stages ensures the thermostat accurately controls your HVAC equipment, delivering consistent temperatures and minimizing energy waste. Refer to your HVAC system’s documentation to determine the correct number of stages. Incorrect stage configuration can result in short-cycling or insufficient heating/cooling. Careful adjustment is key for peak performance.
Setting Time and Date
Accurate time and date settings are crucial for the Honeywell T4 Pro’s scheduling functions to operate correctly. Navigate to the system settings menu on the thermostat display. You’ll find options to adjust both the current time and date. Ensure the time is set to the correct AM or PM designation.
The thermostat typically supports a 24-hour or 12-hour time format; select your preference. Verify the date is accurate, as this impacts any programmed schedules or holiday settings. Incorrect time or date settings will cause scheduling errors, leading to unexpected temperature adjustments. Double-check your entries before saving!

Advanced Settings
Explore customizable options for fan control, temperature calibration, and filter change reminders, enhancing your Honeywell T4 Pro’s performance and user experience.
Fan Control Settings
The Honeywell T4 Pro offers versatile fan control options to optimize comfort and energy efficiency. You can select “Auto” for the fan to run only during heating or cooling cycles, ensuring efficient operation. Alternatively, choose “On” to keep the fan running continuously, providing consistent air circulation throughout your home.
For enhanced air quality, consider the “Circulate” setting, which periodically runs the fan for a set duration, even when heating or cooling isn’t active. This helps distribute air and filter out allergens. Customize the circulation frequency to suit your preferences.
Access these settings through the thermostat’s menu, navigating to the “Fan” section. Adjust the fan mode to align with your comfort needs and energy-saving goals. Proper fan control contributes significantly to a comfortable and efficient home environment.
Temperature Calibration
Accurate temperature readings are crucial for optimal comfort and energy savings. The Honeywell T4 Pro allows for temperature calibration to ensure the displayed temperature matches your preferred thermometer. If you notice a discrepancy between the thermostat’s reading and a trusted source, calibration is recommended.
Access the calibration feature through the thermostat’s settings menu, typically found under “System Settings” or “Advanced Settings”. You’ll be able to adjust the displayed temperature in small increments (e.g., 1°F or 0.5°C).
Carefully adjust the calibration value until the thermostat accurately reflects the temperature measured by your reference thermometer. Regular calibration ensures consistent and reliable temperature control, maximizing comfort and minimizing energy waste.
Filter Change Reminders
Maintaining a clean air filter is vital for efficient HVAC system operation and indoor air quality. The Honeywell T4 Pro thermostat offers a convenient filter change reminder feature to help you stay on schedule. This prevents reduced airflow, increased energy consumption, and potential system damage.
You can configure the reminder based on time (e.g., every 30, 60, or 90 days) or runtime hours. Access this setting within the thermostat’s menu, usually under “Maintenance” or “Reminders”. The thermostat will then display a notification when a filter change is due.
Resetting the reminder after replacing the filter is simple, ensuring continued accurate tracking. Proactive filter changes contribute to a healthier home environment and prolonged system lifespan.
Specifications
The Honeywell T4 Pro operates at 32 Volts DC, with a maximum power draw of 5.5W, and is Class 2 rated for safety and efficiency.
Electrical Ratings
The Honeywell T4 Pro thermostat is designed to operate within specific electrical parameters to ensure safe and reliable performance. It’s crucial to adhere to these ratings during installation. The thermostat requires a 24 VAC (Volts Alternating Current) power source, commonly supplied by the heating, ventilation, and air conditioning (HVAC) system’s control transformer.
Maximum voltage input should not exceed 32 Volts DC. The maximum power consumption, or Pmax, is 5.5 Watts. It is classified as a Class 2 power source, indicating limited energy output and requiring specific wiring methods for safety. The thermostat is also rated for use in potentially explosive environments, specifically II 2 GD Ex d, demonstrating its robust design and adherence to stringent safety standards. Always consult a qualified technician for electrical work.
Temperature Range
The Honeywell T4 Pro thermostat is engineered to maintain comfortable temperatures across a broad spectrum of environmental conditions. Its operational temperature range is designed to accommodate most residential and light commercial settings. The thermostat accurately displays and controls temperatures typically between 32°F and 100°F (0°C and 38°C).
However, it’s important to note that prolonged exposure to temperatures outside this range may affect the thermostat’s accuracy and lifespan. Avoid installing the thermostat in locations subject to direct sunlight, drafts, or proximity to heat-generating appliances, as these factors can skew temperature readings. Proper placement ensures optimal performance and consistent climate control within the specified operating limits.
Dimensions and Weight
Understanding the physical specifications of the Honeywell T4 Pro is crucial for a seamless installation process. The thermostat’s dimensions are approximately 4.7 inches (119 mm) in width, 3.1 inches (79 mm) in height, and 1.2 inches (30 mm) in depth. These compact dimensions allow for versatile mounting options on various wall types and configurations.
Regarding weight, the T4 Pro thermostat is remarkably lightweight, tipping the scales at around 0.44 pounds (200 grams). This minimal weight ensures easy handling during installation and minimizes stress on the mounting surface. These specifications contribute to a clean, unobtrusive aesthetic while providing robust functionality and reliable performance within your home or building.

Troubleshooting
Resolve common installation issues quickly with our guide, including error code explanations and solutions, plus direct access to Honeywell support resources.
Common Installation Issues
Incorrect Wiring: A frequent problem involves misconnected wires, leading to system malfunctions. Double-check all connections against the wiring diagrams provided, ensuring each wire corresponds to the correct terminal. Pay close attention to the UWP wiring designations for accurate placement.
Power Supply Problems: Verify the power supply voltage matches the thermostat’s requirements (typically 24VAC). Insufficient power can cause erratic behavior or a complete lack of operation. Confirm the transformer is functioning correctly.
Compatibility Concerns: Ensure your heating and cooling system is compatible with the Honeywell T4 Pro. Some older systems may require adapters or may not be fully supported. Review the system compatibility check section before proceeding.
Display Issues: If the display is blank or dim, check the power connections and ensure the thermostat is receiving adequate voltage. A faulty display may require replacement.
Error Codes and Solutions
“E1” – Communication Error: This indicates a problem with the connection to the system. Verify wiring connections at both the thermostat and the furnace/air handler. Check for loose wires or damaged connectors.
“E2” – Sensor Fault: A faulty temperature sensor is detected. Try resetting the thermostat. If the error persists, the sensor may need replacement – contact Honeywell support.
“E3” – Low Voltage: Insufficient power is reaching the thermostat. Check the transformer output voltage and wiring. Ensure the power supply meets the thermostat’s requirements.
“F2” – Flame Sensing Error: (For systems with flame sensing) Indicates a problem with the flame sensor circuit. Consult a qualified HVAC technician for diagnosis and repair.
General Troubleshooting: If an unfamiliar error code appears, consult the full Honeywell T4 Pro manual or contact Honeywell support for assistance.
Contacting Honeywell Support
For dedicated assistance with your Honeywell T4 Pro thermostat, several support avenues are available. Visit the official Honeywell Home website at home.honeywell.com for a comprehensive FAQ section, troubleshooting guides, and downloadable resources.
You can also reach Honeywell Support directly via phone at 1-800-468-1513. Be prepared to provide your thermostat model number and a detailed description of the issue you are experiencing.
Online chat support is often available through the Honeywell Home website, offering real-time assistance from a support representative. Ensure you have your installation details readily available for efficient support.
Refer to the official documentation for warranty information and further contact options.